
Inside: Learn to make sweet Easter cards with candy-colored bunny die cuts on handmade plaid backgrounds, with full instructions and designer tips.
Trade out a box of fuzzy chicks for a pair of earrings. Switch a sketchbook for a coloring book. Swap trendy hair clips for a little kid’s craft kit.
Making Easter baskets for my daughters is my annual tradition, but a mom has to stay hip with the kid trends! This year, my younger daughter (age 10) will still be excited about sidewalk chalk in her basket. While my fourteen-year-old has requested a strand of LED fairy lights for her room.
But one thing that doesn’t change as they get older: the Easter candy. A chocolate bunny, Jelly Belly beans, and a bag of candy-shelled eggs are always welcome
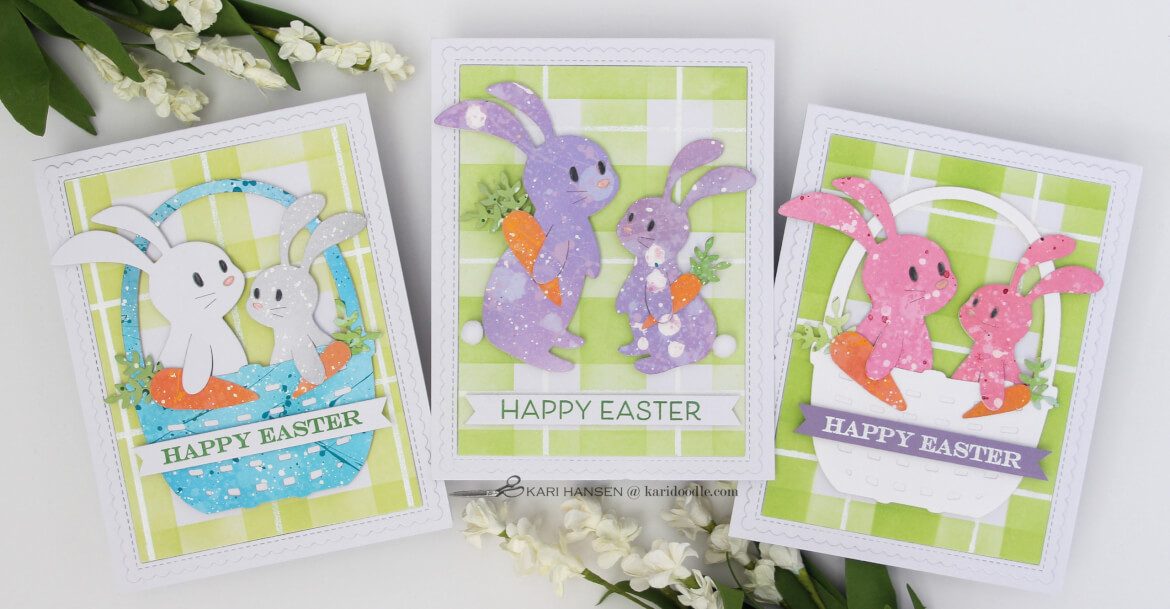
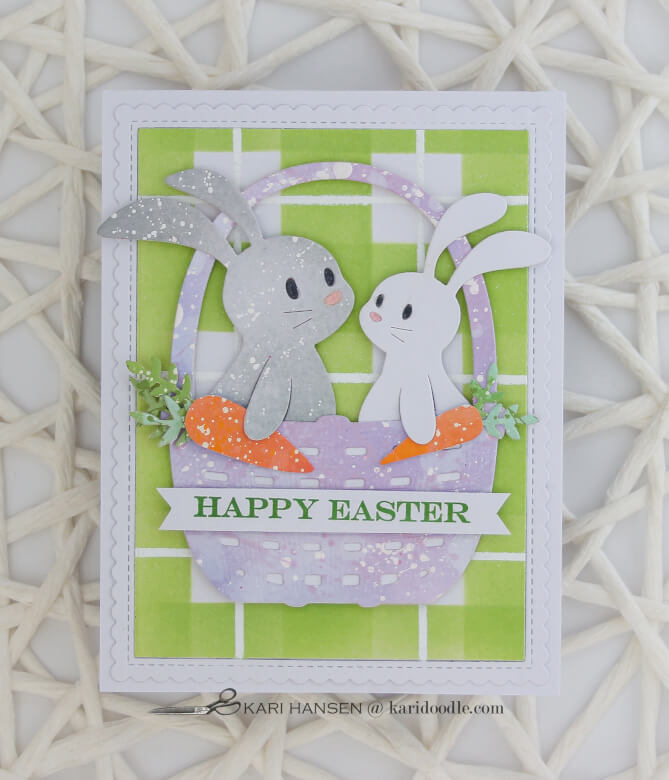
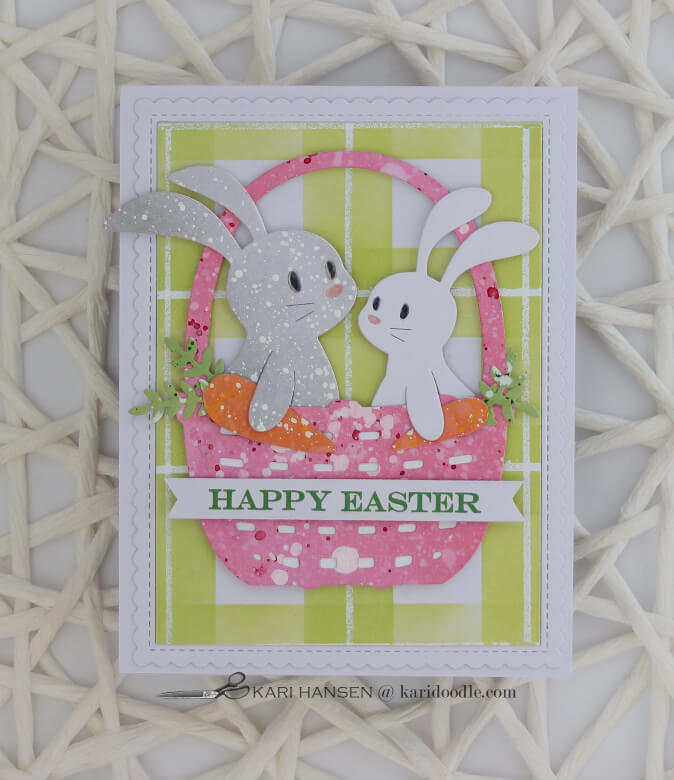
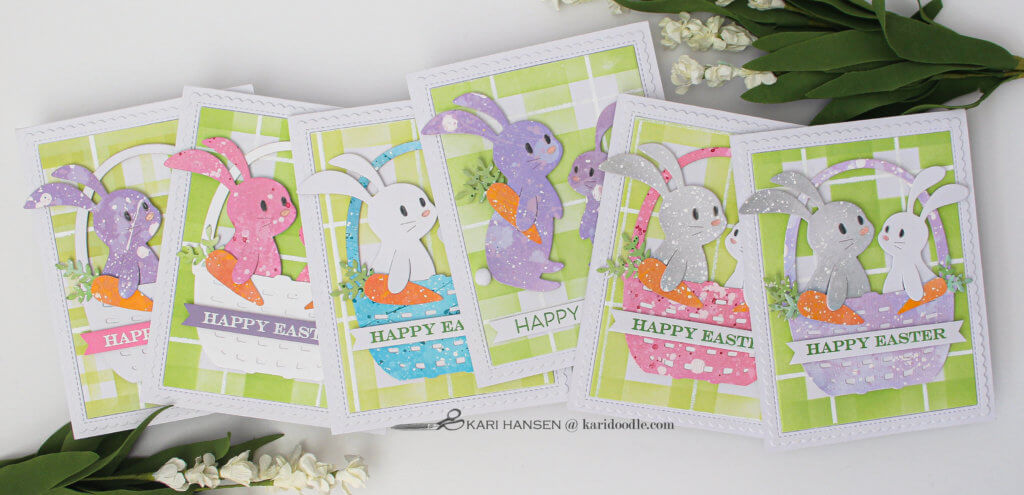
In the spirit of Easter baskets, I’ve also made virtual ones, on cards, using Basket Full of Bunnies, a darling die set from Spellbinders. This set contains a woven basket, a large and small bunny, and floral accents.
In this post:
Craft Candy-Colored Bunnies and Baskets
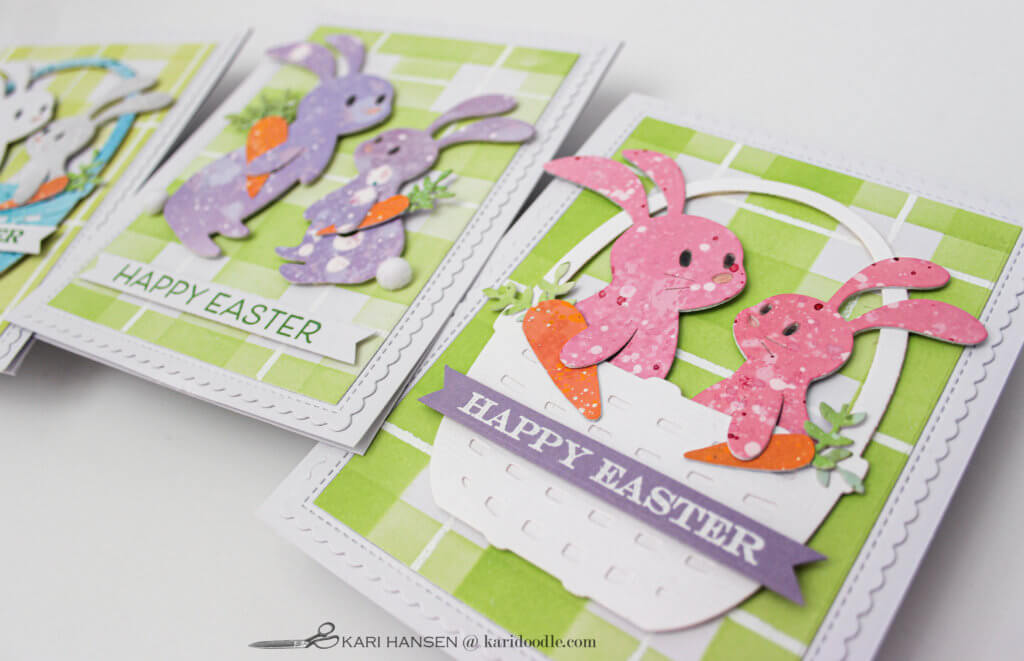
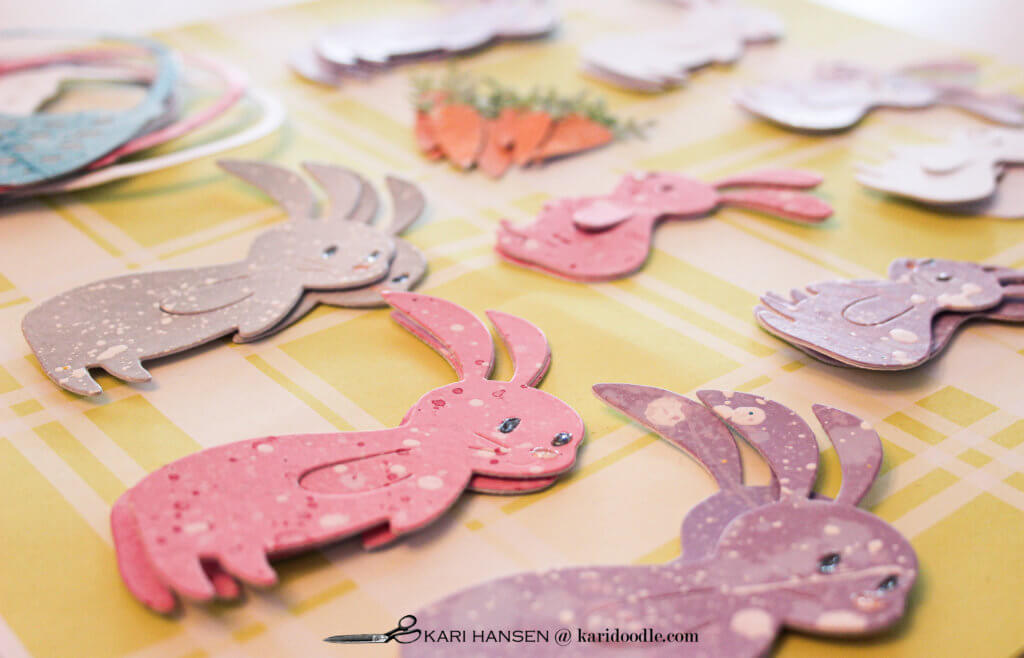
I often like to next-level die cuts by adding color and texture with ink, paint, and creative techniques. For these die cuts, I was inspired by those malted milk mini eggs with the speckled candy shell in bright colors. To replicate that dappled and dotted look, I created colorful panels by blending Distress Oxide inks, then sprinkled on water droplets and finished with paint splatters. For full instructions, see step-by-step below.
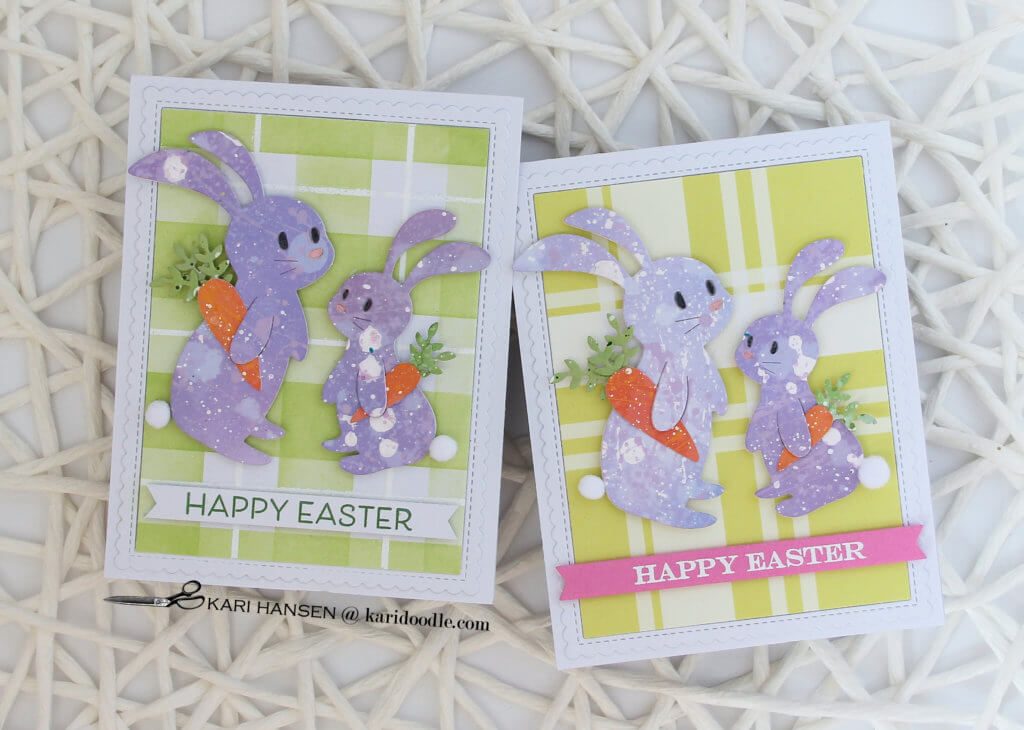
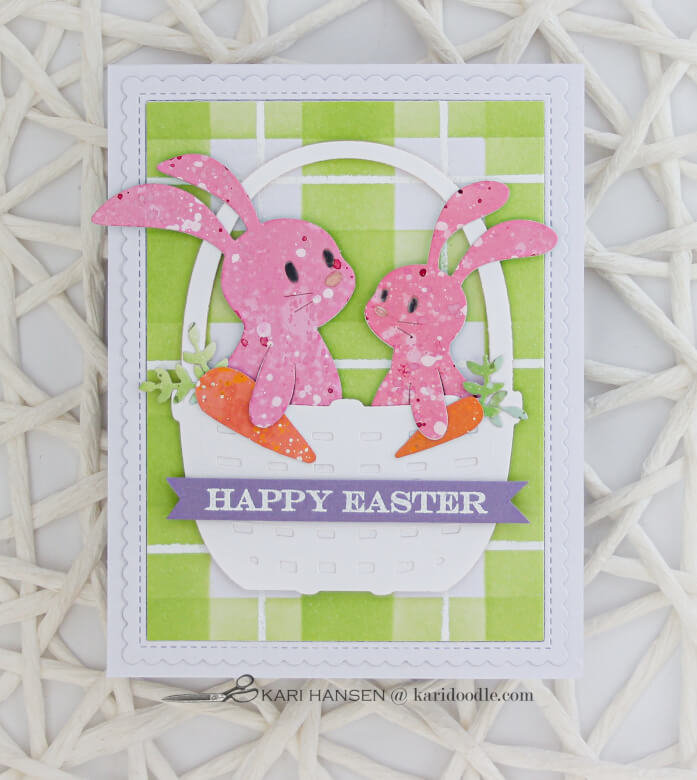
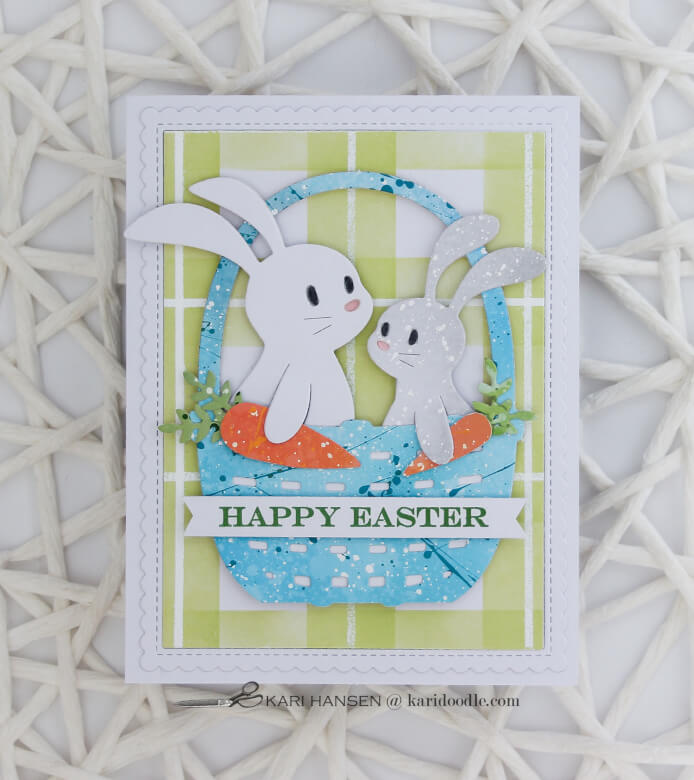
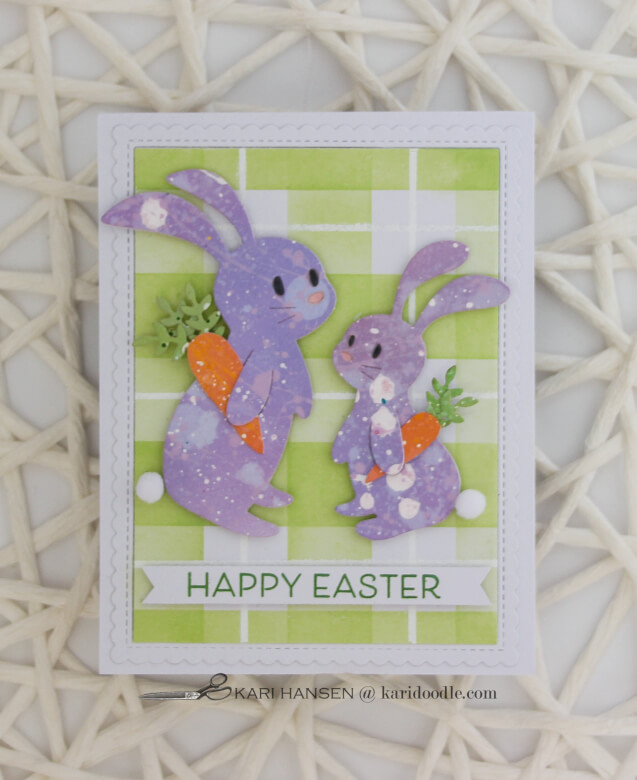
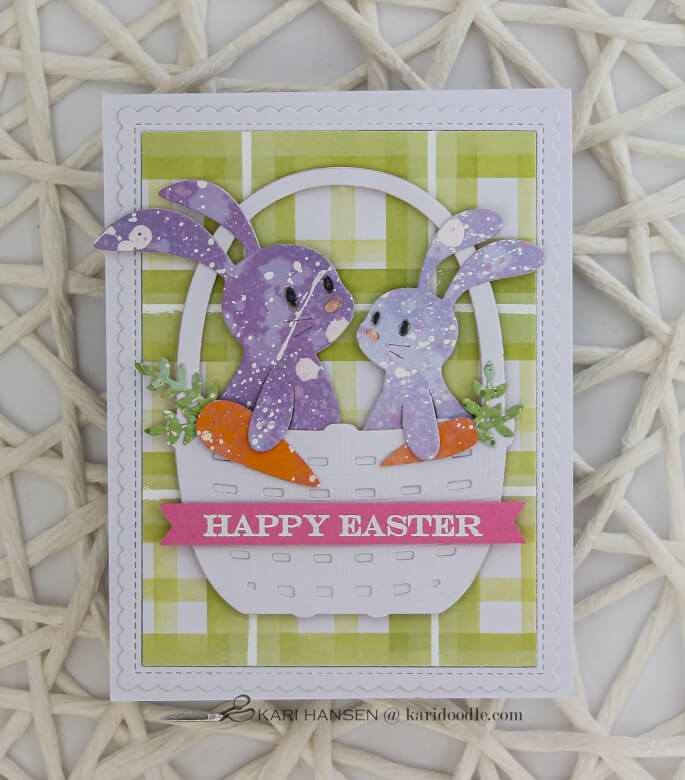
I repeated the process to create panels in robins-egg blue, tulip pink, lilac purple, carrot orange, and grass green. I used the dies to cut bunnies and baskets from these panels. I used plain white cardstock for a few additional baskets and bunnies. I paired colored bunnies with white baskets and white or grey bunnies with colored baskets.
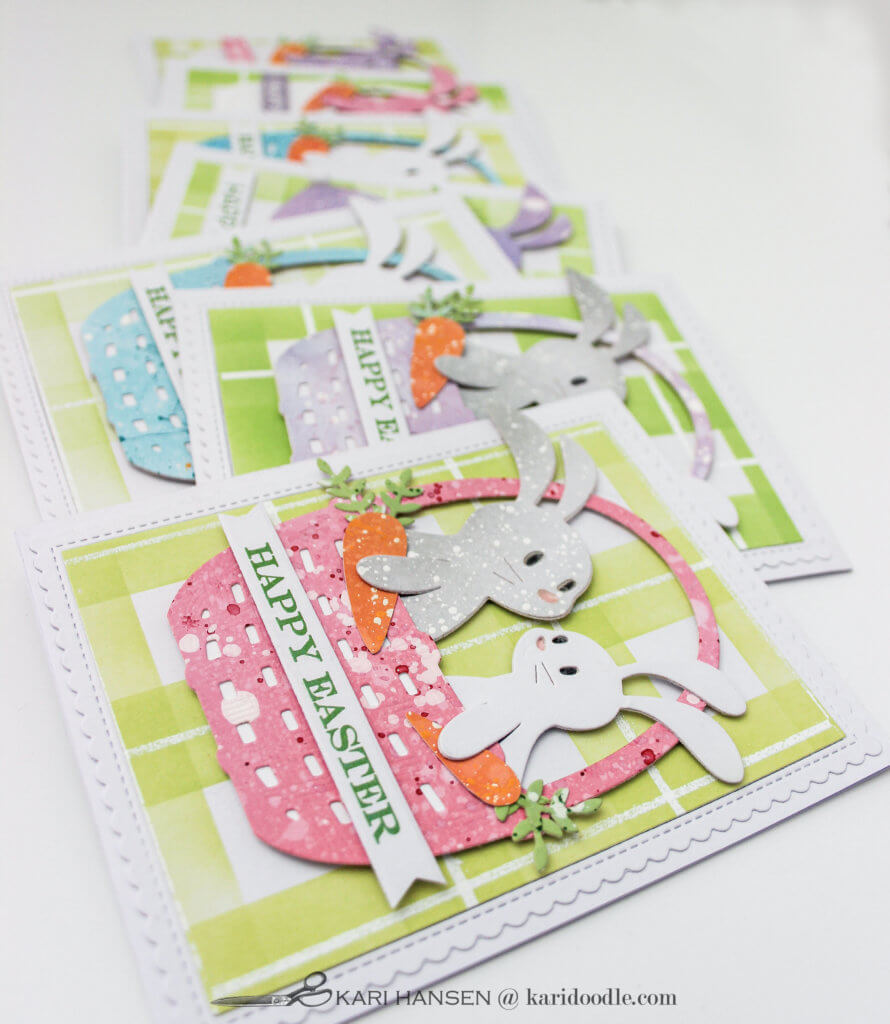
Top with the Cutest Carrots
To complete the Easter vignettes, my little bunnies needed some carrots! To make them, I drew two sizes of carrots on heavy scrap cardstock, cut out the two carrot shapes, and used them as templates. I traced the templates on the back of the orange inked panel and then cut them out with fine-tip scissors. To finish the carrots, I used the small leaf-spring die to cut foliage from the green inked panel and then adhered two sprigs to each carrot top.
See how I went carrot-crazy on these Easter cards: Send Loads of Easter Love with Super-Sized Carrot Cards
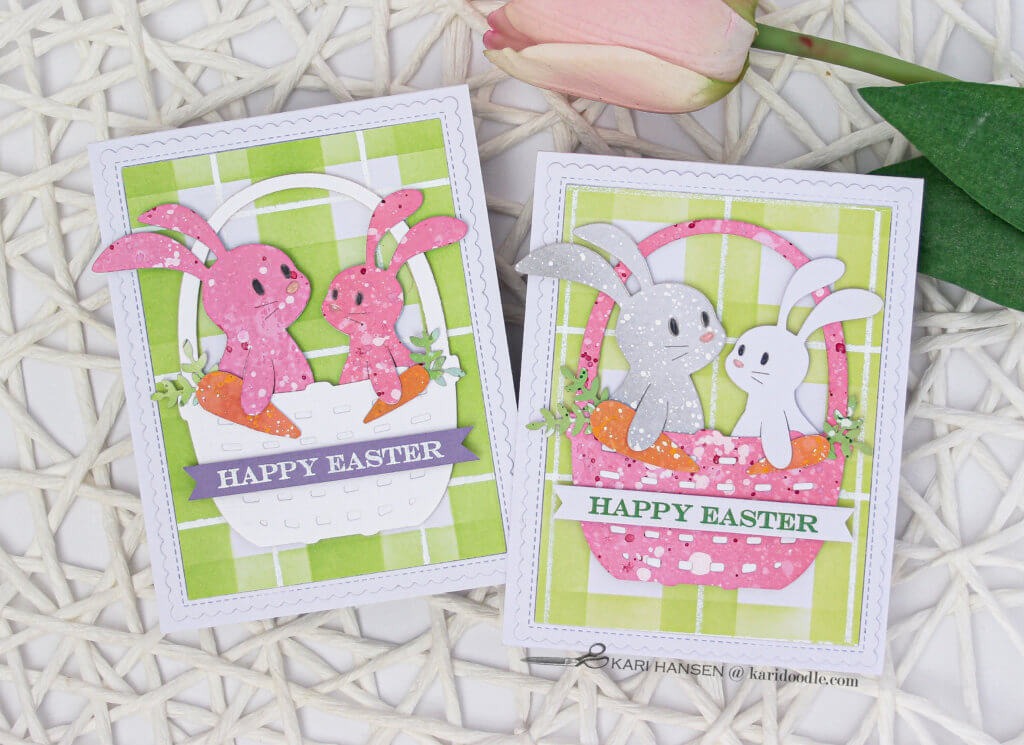
Stencil a Spring-fresh Plaid
I made backgrounds for the bunnies and baskets by stenciling light, bright plaids in fresh green and white. I used the Plaid Background Builder stencil set (Honey Bee) to ink the wide stripes with Twisted Citron Distress ink. Then I added thin white accent stripes with a VersaMarker and white embossing powder. I like how the crisp, shiny white lines contrast with the soft, semi-transparent lime stripes. See below for full plaid-building instructions.
Learn how to make plaids using watercolors: This is How to Make the Best Simple Watercolor Tartans
If you prefer, you can skip this step and use patterned paper instead of a handmade plaid. Look for a plaid or gingham check in a soft green to complement but not overpower your bunnies and baskets. The next photo shows how I used a plaid patterned paper from my stash for a few of my cards. Because that exact patterned paper is retired, I’ve suggested some similar papers in the supply list at the end of this post.
Basket and Bunny Die Sets
Sadly, the Basket Full of Bunnies die set is no longer on the Spellbinders website. If you don’t already have this die set in your stash, here are some similar die sets to consider.
- Build-a-Basket: Easter die set | Lawn Fawn
- Springtime Bunny die set | Lawn Fawn
- Easter Basket die set | Elizabeth Craft
- Bunny die set | Elizabeth Craft
- Bunnies Large die set | Paper Rose
- Woven Basket Pop Up Easel die set | Poppy Stamps
- Bunny Basket Stamp and Die bundle | Papertrey Ink
- Weave-a-Basket die set | Papertrey Ink
- Easter Basket die set | Simon Says Stamp
- Large Easter Egg Basket die set | Simon Says Stamp
- Tim Holtz Carrot Bunny die set | Sizzix
Send the Sweetest Easter Card Confection
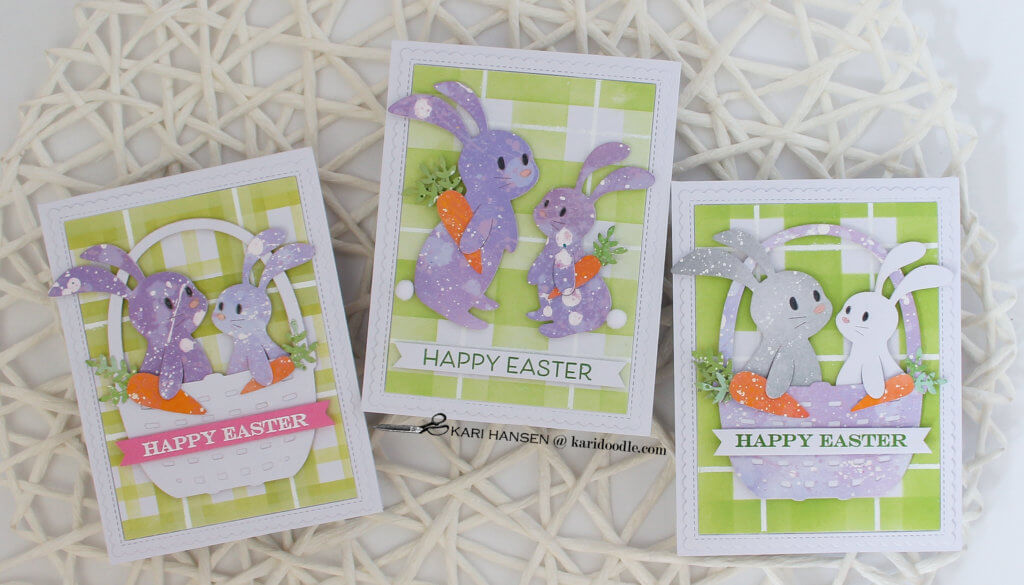
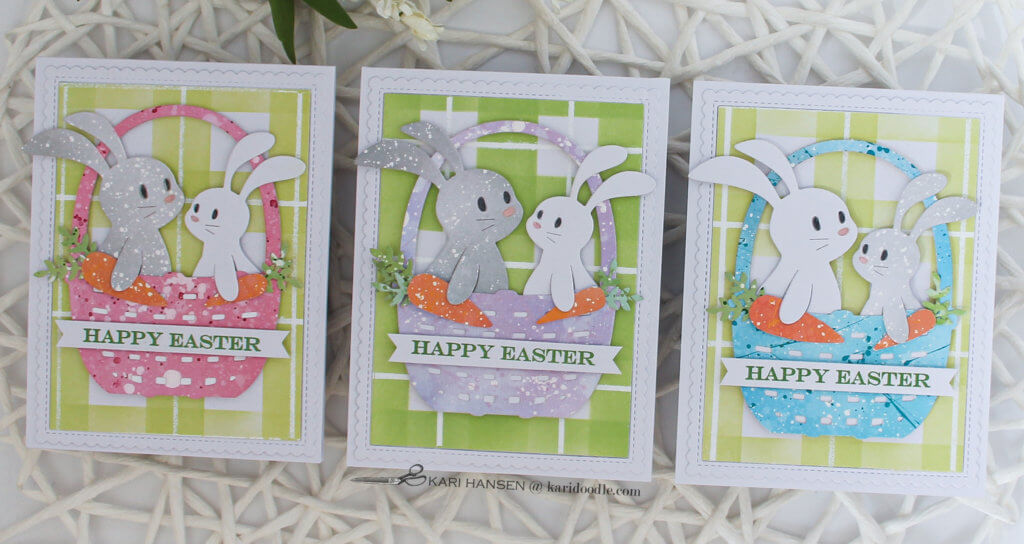
As delightful as any candy-coated Easter treats, these darling bunnies are ready to celebrate a sweet spring. I love the texture and dimension the saturated color palette and speckled pattern brings to the die cuts, set off against the airy plaid background.
Keep reading for full instructions and a supply list.

Step by Step: Add Shine and Detail to Handmade Plaids
- Cut the background cardstock to a minimum of 5.5” square. Place wide-stripe stencil on the cardstock, aligned vertically, and secure. (I used a light coating of Pixie Spray on the back of my stencils.)
- Using a blender brush and dye ink, apply an even coating of ink to paper through stencil. Start with a light hand; you can add more later if you want the ink darker.
- Rotate stencil to align horizontally and repeat step #2. Remove stencil and allow ink to dry thoroughly. Test for dryness, if needed, before moving to step #4 by sprinkling with embossing powder. If the powder sticks, the ink needs more drying time.
- Dust inked background with anti-static powder. Use a t-ruler to draw straight lines in one direction with a VersaMarker, going over each line a few times. The lines can be drawn either on top of the ink stripes or in between the stripes (or both). Sprinkle with embossing powder, tap of the excess, and melt with a heat tool.
- Rotate the paper and repeat step #4 to create perpendicular lines.
- Trim or die-cut tartan panel to desired size for card background.
Step by Step: Dress Up Die Cuts with Candy-Colored Ink
- On smooth white cardstock, use an ink-blending brush to make an all-over dappled color blend. For each panel, I used Distress Oxide inks in two monochromatic hues, such as Kitsch Flamingo and Picked Raspberry. Blend variegated areas of each color throughout the panel for color variation. Repeat to create each color sheet; I made sheets in pink, lavender, purple, light grey, blue, green, and orange. See the supply list below for the specific ink colors I used.
- To create even more variation and texture on the inked panels, drop and spritz water onto the inked piece. Let sit for a few seconds, then soak up water with a paper towel.
- Splatter the background with drops of darker monochromatic colors, using watercolor paints, acrylic paints, or more Distress Oxide ink mixed with water on a palette. Finish with white splatters of watered-down acrylic paint. (I used a splat box for this step to contain the paint.)
- Once the panel is completely dry, die-cut bunnies and baskets from the Basket Full of Bunnies (Spellbinders) die set. Optional: I backed most of my bunnies with a second layer of white cardstock for extra durability and dimension.
- Complete the bunny die cuts’ faces with cardstock. Add Glossy Accents to eyes and noses; allow to dry.
- Use a remnant of orange inked panel to make little carrots for the bunnies to hold. To do this, I drew two sizes of carrots on heavy scrap cardstock, cut out the two carrot shapes, and used them as templates. I traced the templates on the back of the orange sheet and then cut them out with fine-tip scissors. To finish the carrots, I used the small leaf sprig die to cut foliage from the green inked panel and then adhered two sprigs to each carrot top.
Step by Step: Stamp Sentiments and Assemble Cards
- To make the sentiment, prep cardstock with anti-static powder. Stamp sentiment (Keep It Simple: Easter stamp set, Papertrey Ink) with pigment ink. Sprinkle on clear detail embossing powder, tap of the excess and heat set the powder. Trim the sentiment with a strip die set (Everyday Sentiment Banners die set, Lawn Fawn) or paper trimmer. On the colored cardstock sentiments, I used Versamark ink and white detail embossing powder. For the white cardstock sentiments, I used Distress Oxide Mowed Lawn ink with clear detail embossing powder. Add foam adhesive to the back of the completed sentiment strip.
- Die-cut additional baskets and bunnies from plain white cardstock as needed. Assemble the die-cut bunnies, baskets, and carrots. I paired colored bunnies with white baskets and white or grey bunnies with colored baskets. Add foam adhesive to back of bunnies and baskets.
- Die-cut scalloped frame from white cardstock and background piece from green tartan panel with Stitched Rectangle Scallop Edge Frames die set (My Favorite Things). Cut, score, and fold an A2 white card base. Adhere background and frame to card base.
- Arrange bunnies, baskets, and sentiment strips on tartan background. Remove release paper from foam adhesive and adhere pieces in place. Finish with white pom-pom tails on bunnies that are not in baskets.
Supplies
- Basket Full of Bunnies die set | Spellbinders
- Stitched Rectangle Scallop Edge Frames die set | MFT
- Plaid Background Builder stencil set | Honey Bee Stamps
- Everyday Sentiment Banners die set | Lawn Fawn
- Keep It Simple: Easter stamp set | Papertrey Ink
- Distress inks | Ranger: Twisted Citron
- Distress Oxide inks | Ranger: Kitsch Flamingo, Picked Raspberry, Worn Lipstick (pink panel); Carved Pumpkin, Spiced Marmalade (orange panel); Broken China, Tumbled Glass (blue panel); Frayed Burlap, Weathered Wood (grey panel); Seedless Preserves, Victorian Velvet (purple panel); Bundled Sage, Mowed Lawn, Shabby Shutters (green panel)
- Gansai Tambi watercolor set | Kuretake
- White cardstock #110 | Neena Solar White Classic Crest
- Various cardstock: pink, black, lavender
- White acrylic craft paint
- VersaMarker pen | Tsukineko
- Glossy Accents | Ranger
- White detail embossing powder | Ranger
- Clear detail embossing powder | Ranger
- White mini pom poms
- Made to Match Sunrise patterned paper | American Crafts (retired) similar:
- Green Gingham 12×12” patterned paper | Simple Stories
- Gotta Have Gingham Rainbow Greta 12×12” patterned paper | Lawn Fawn
- Buffalo Check 6×6” paper pad | Doodlebug Design
Tools & Adhesive
- Platinum 6 die cutting machine | Spellbinders
- Misti stamping platform | My Sweet Petunia
- Paper trimmer
- Water Media Mat | Waffle Flower
- Heat tool | Wagner
- Scoring board
- Teflon bone folder
- Blending brushes | Taylored Expressions
- Splat box | Tim Holtz for Stampers Anonymous
- T-ruler
- Anti-static powder tool | EK Success
- Round paint palette, plastic
- Black Velvet watercolor brushes, round #4, 8, 12 | Silver
- Twist-Erase 0.5 mechanical pencil | Pentel
- Small fine-tipped scissors | EK Success
- Distress Sprayer | Tim Holtz for Ranger
- Kushgrip 8.5” scissors | Tonic
- Pixie spray | iCraft
- Precision Craft Glue | Bearly Art